Visual Studioni O‘rnatish va Hello World! dasturini tuzish
![Kod:
#pragma endregion
priv at e: Sy st em::V oid but t on1_Click (Sy st em::Object ^ sender, Sy st em::Ev ent A rgs^ e) {
chart 1->Series[0]->Point s->Clear();
double x = 0;
double m = -1.1;
w hile (x < 8)
{
chart 1->Series[0]->Point s->A ddX Y (x ,((x +1)*(x +1))/(x -2));
chart 1->Series[1]->Point s->A ddX Y (m, ((m + 1) * (m + 1)) / (m - 2));
x += 0.1;
m -= 0.1;
}
}
priv at e: Sy st em::V oid chart 1_Click (Sy st em::Object ^ sender, Sy st em::Ev ent A rgs^ e) {
}
priv at e: Sy st em::V oid but t on2_Click (Sy st em::Object ^ sender, Sy st em::Ev ent A rgs^ e) {
if (colorDialog1->Show Dialog() == Sy st em::Window s::Forms::DialogResult ::OK)
{
chart 1->Series[0]->Color = colorDialog1->Color;
}
}
priv at e: Sy st em::V oid but t on3_Click (Sy st em::Object ^ sender, Sy st em::Ev ent A rgs^ e) {
if (colorDialog1->Show Dialog() == Sy st em::Window s::Forms::DialogResult ::OK)
{
chart 1->Series[1]->Color = colorDialog1->Color;
}
Xulosa . Topshiriqni bajarishda 1 ta button va 1 ta chartdan foydalanildi.](/data/documents/148df642-e252-466c-bd8d-7abaddae66c1/page_8.png)
![9-labaratoriya ishi
8-labartoriya ishingizgadagi garifkining rangini colorDialog yordamida rangni
tanlab o’zgartiruvchi dasturni tuzing va hisobot yozing.
Kod:
#pragma endregi on
pri v at e: Sy st em::Voi d but t on1_Cl i ck (Sy st em::Obj ect ^ sender, Syst em::Ev ent Args^ e) {
chart 1->Seri es[0]->Poi nt s->Cl ear();
doubl e x = 2.1;
doubl e m = -1.1;
w hil e (x < 8)
{
chart 1->Seri es[0]->Poi nt s->AddX Y (x,((x+1)*(x+1))/(x-2));
chart 1->Seri es[1]->Poi nt s->AddX Y (m, ((m + 1) * (m + 1)) / (m - 2));
x += 0.1;
m -= 0.1;
}](/data/documents/148df642-e252-466c-bd8d-7abaddae66c1/page_9.png)
![}
pri v at e: Sy st em::Voi d chart 1_Cl i ck (Sy st em::Obj ect ^ sender, Syst em::Ev ent Args^ e) {
}
pri v at e: Sy st em::Voi d but t on2_Cl i ck (Sy st em::Obj ect ^ sender, Syst em::Ev ent Args^ e) {
if (col orDi al og1->Show Di al og() == Sy st em::Window s::Forms::Di al ogResul t ::OK)
{
chart 1->Seri es[0]->Col or = colorDi al og1->Col or;
}
}
pri v at e: Sy st em::Voi d but t on3_Cl i ck (Sy st em::Obj ect ^ sender, Syst em::Ev ent Args^ e) {
if (col orDi al og1->Show Di al og() == Sy st em::Window s::Forms::Di al ogResul t ::OK)
{
chart 1->Seri es[1]->Col or = colorDi al og1->Col or;
}
Xulosa . Topshiriqni bajarishda 1 ta button, 1 ta ColorDialog va 1 ta chartdan foydalanildi.](/data/documents/148df642-e252-466c-bd8d-7abaddae66c1/page_10.png)
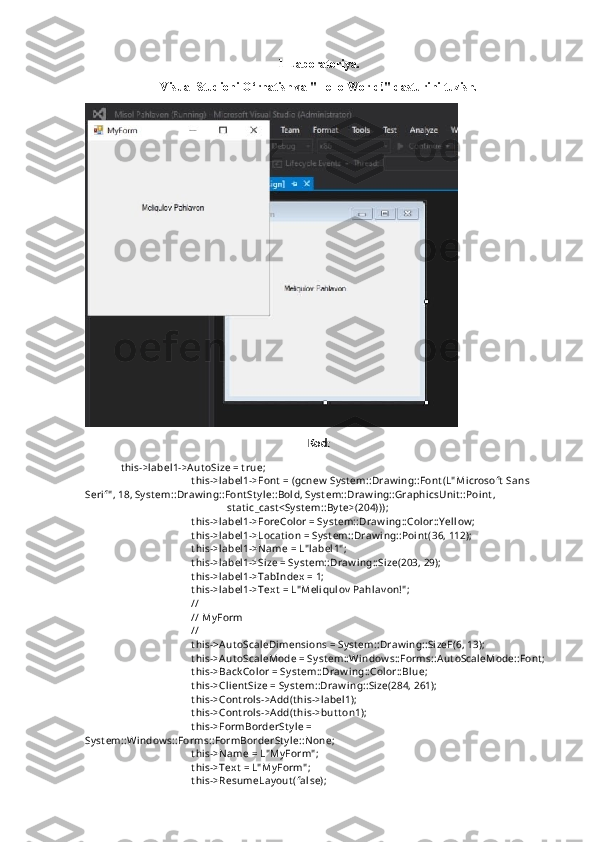
1-Laboratoriya. Visual Studioni O‘rnatish va "Hello World!" dasturini tuzish. Kod: t hi s->l abel 1->Aut oSi ze = t rue; t hi s->l abel 1->Font = (gcnew Syst em::Draw i ng::Font (L" Mi crosoft Sans Seri f" , 18, Sy st em::Draw i ng::Font St y l e::Bol d, Syst em::Draw i ng::Graphi csUni t ::Poi nt , st at i c_cast <Sy st em::By t e>(204))); t hi s->l abel 1->ForeCol or = Syst em::Draw i ng::Col or::Y el l ow ; t hi s->l abel 1->Locat i on = Syst em::Draw i ng::Poi nt (36, 112); t hi s->l abel 1->Name = L" l abel 1" ; t hi s->l abel 1->Si ze = Sy st em::Draw ing::Si ze(203, 29); t hi s->l abel 1->TabIndex = 1; t hi s->l abel 1->Text = L" Meli qul ov Pahl av on!" ; // // My Form // t hi s->Aut oScal eDi mensi ons = Sy st em::Draw i ng::Si zeF(6, 13); t hi s->Aut oScal eMode = Syst em::Wi ndow s::Forms::Aut oScal eMode::Font ; t hi s->Back Col or = Sy st em::Draw i ng::Col or::Bl ue; t hi s->Cli ent Si ze = Sy st em::Draw i ng::Si ze(284, 261); t hi s->Cont rol s->Add(t hi s->l abel 1); t hi s->Cont rol s->Add(t hi s->but t on1); t hi s->FormBorderSt y l e = Syst em::Wi ndow s::Forms::FormBorderSt y l e::None; t hi s->Name = L" My Form" ; t hi s->Text = L" My Form" ; t hi s->ResumeLay out (fal se);
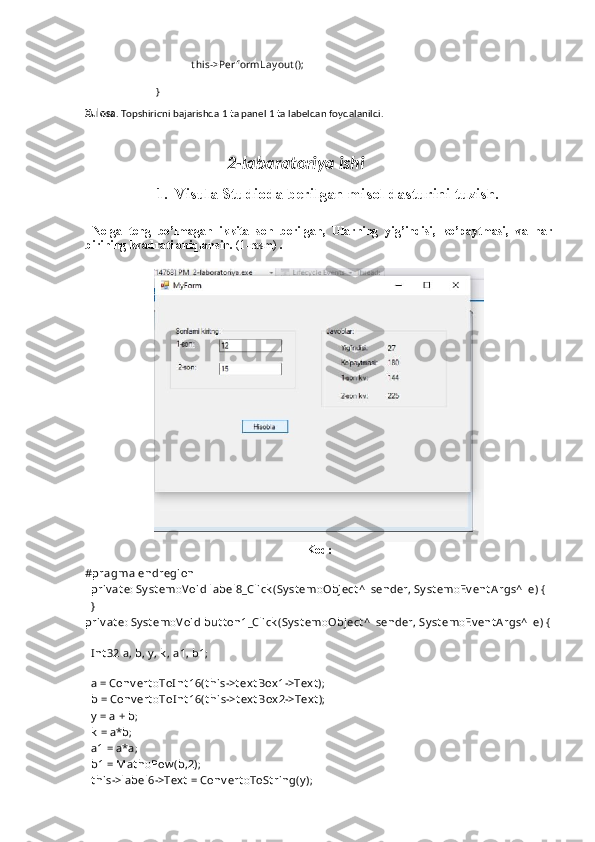
t hi s->PerformLay out (); } Xulosa . Topshiriqni bajarishda 1 ta panel 1 ta labeldan foydalanildi. 2-labaratoriya ishi 1. Visula Studioda berilgan misol dasturini tuzish. Nolga teng bo’lmagan ikkita son berilgan, Ularning yig’indisi, ko’paytmasi, va har birining kvadrati aniqlansin. (1-rasm) . Kod: #pragma endregion priv at e: Sy st em::V oid label8_Click (Sy st em::Object ^ sender, Sy st em::Ev ent A rgs^ e) { } priv at e: Sy st em::V oid but t on1_Click (Sy st em::Object ^ sender, Sy st em::Ev ent Args^ e) { I nt 32 a, b, y , k , a1, b1; a = Conv ert ::ToI nt 16(t his->t ex t Box 1->Tex t ); b = Conv ert ::ToI nt 16(t his->t ext Box 2->Tex t ); y = a + b; k = a*b; a1 = a*a; b1 = Mat h::Pow (b,2); t his->label6->Tex t = Conv ert ::ToSt ring(y );
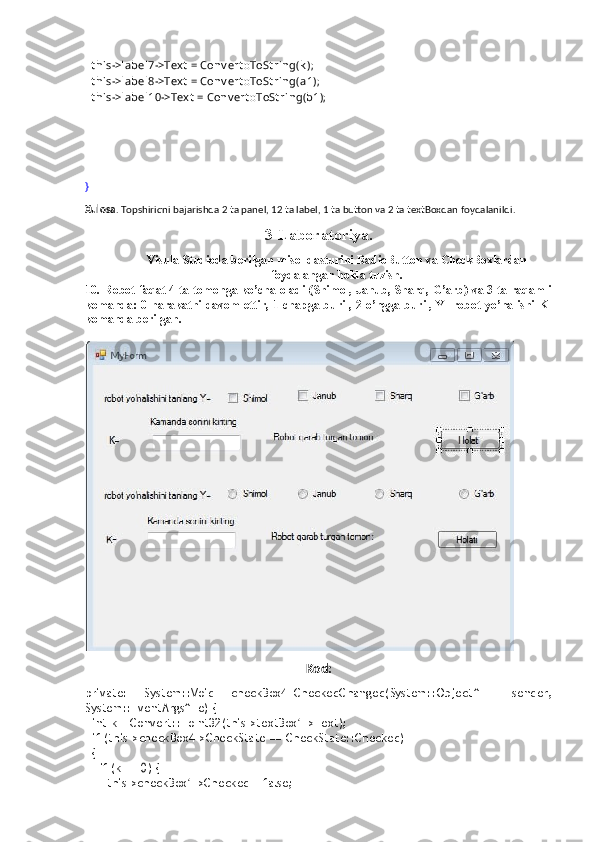
t his->label7->Tex t = Conv ert ::ToSt ring(k ); t his->label8->Tex t = Conv ert ::ToSt ring(a1); t his->label10->Tex t = Conv ert ::ToSt ring(b1); } Xulosa . Topshiriqni bajarishda 2 ta panel, 12 ta label, 1 ta button va 2 ta textBoxdan foydalanildi. 3-Laboratoriya. Visula Studioda berilgan misol dasturini RadioButton va CheckBoxlardan foydalangan holda tuzish. 10. Robot faqat 4 ta tomonga ko’cha oladi (Shimol, Janub, Sharq, G’arb) va 3 ta raqamli komanda: 0-harakatni davom ettir, 1-chapga buril, 2-o’ngga buril, Y- robot yo’nalishi K- komanda berilgan. Kod: private: System::Void checkBox4_CheckedChanged(System::Object^ sender, System::EventArgs^ e) { int k = Convert::ToInt32(this->textBox1->Text); if (this->checkBox4->CheckState == CheckState::Checked) { if (k == 0) { this->checkBox1->Checked = false;
this->checkBox3->Checked = false; this->checkBox2->Checked = false; label5->Text = "Robot qarab turgan tomon: G'arb"; } } if (this->checkBox4->CheckState == CheckState::Checked) { if(k==1) { this->checkBox1->Checked = false; this->checkBox3->Checked = false; this->checkBox2->Checked = false; label5->Text = "Robot qarab turgan tomon: Shimol"; } } if (this->checkBox4->CheckState == CheckState::Checked) { if (k == 2) { this->checkBox2->Checked = false; this->checkBox3->Checked = false; this->checkBox1->Checked = false; label5->Text = "Robot qarab turgan tomon: Janub"; } } } Xulosa . Topshiriqni bajarishda 2 ta Button, 16 ta label, 8 ta radiobutton, 1 ta checkbox va 2 ta textBoxdan foydalanildi. 4-labaratoriya ishi 2 chi va 3 chi labartoriya ishlaringizni birlashtirgan holda TabCotrolni tablariga joylashitirigan holda dasturini tuzib hisobot yozish kerak. Xulosa . Topshiriqni bajarishda TabControldan foydalanildi. 5-labaratoriya ishi
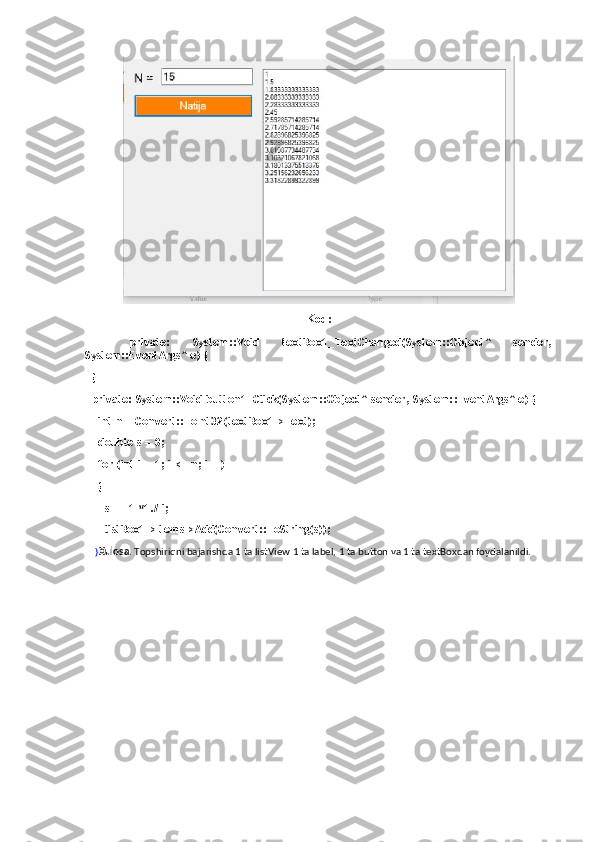
Kod: private: System::Void textBox1_TextChanged(System::Object^ sender, System::EventArgs^ e) { } private: System::Void button1_Click(System::Object^ sender, System::EventArgs^ e) { int n = Convert::ToInt32(textBox1->Text); double s = 0; for (int i = 1; i <= n; i++) { s += 1 *1./ i; listBox1->Items->Add(Convert::ToString(s)); } Xulosa . Topshiriqni bajarishda 1 ta listView 1 ta label, 1 ta button va 1 ta textBoxdan foydalanildi.
